Spooky Spider Cookies
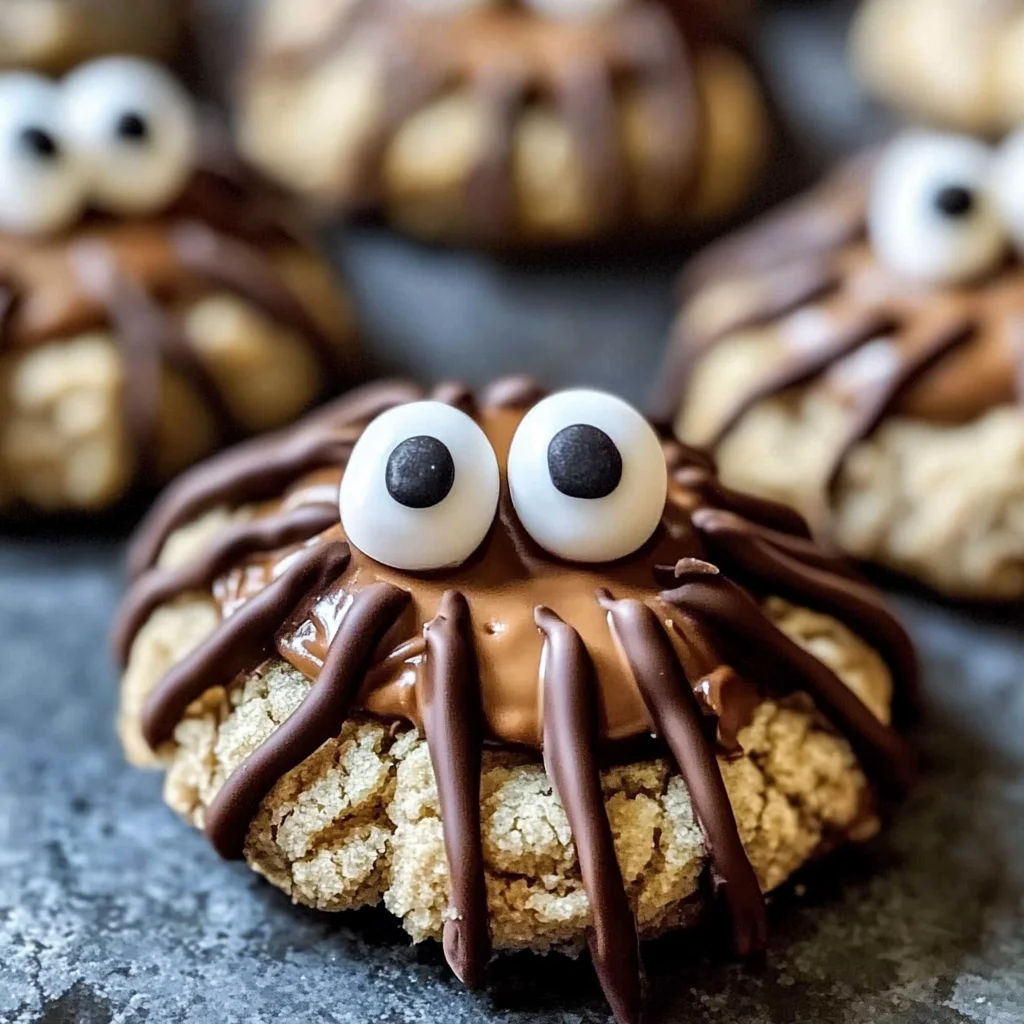
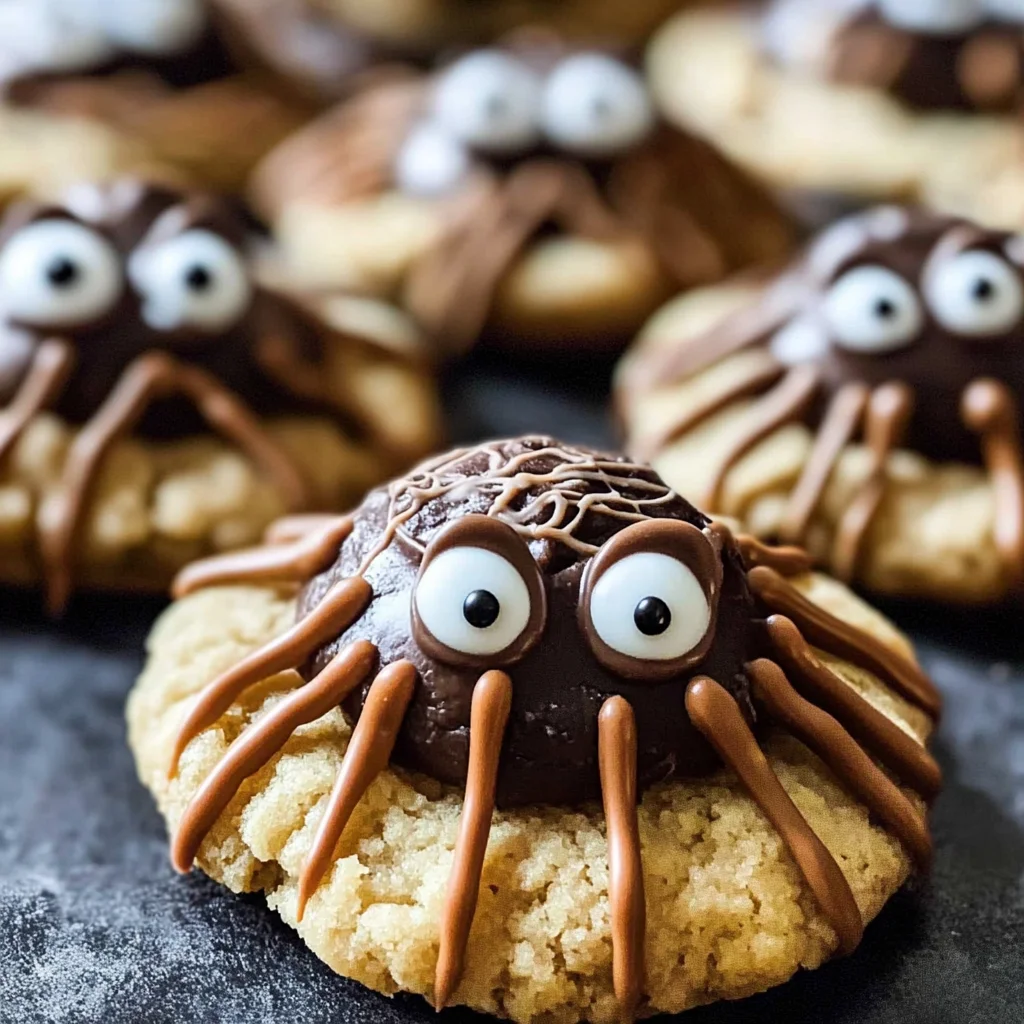
Spooky Spider Cookies are the perfect Halloween treat that combines fun and flavor. These delightful cookies not only impress with their creepy-crawly appearance but also taste deliciously chocolatey. Ideal for Halloween parties, school events, or a spooky movie night at home, these cookies are kid-friendly and easy to make. Plus, they offer a unique twist on traditional desserts that everyone will love!
Why You’ll Love This Recipe
- Fun for All Ages: Making Spooky Spider Cookies is a delightful activity for kids and adults alike, bringing everyone together in the kitchen.
- Creative Decoration: The decorating process allows you to unleash your creativity, making each cookie uniquely spooky.
- Delicious Combination: Rich chocolate cookies combined with truffles create a mouthwatering treat that will satisfy any sweet tooth.
- Quick and Easy: With straightforward steps and simple ingredients, you can whip up these cookies in no time!
- Versatile Treat: Perfect for Halloween-themed gatherings, these cookies can also be made for birthday parties or other festive occasions.
Tools and Preparation
To create your Spooky Spider Cookies, you’ll need some essential tools to ensure everything goes smoothly.
Essential Tools and Equipment
- Baking sheet
- Parchment paper
- Mixing bowl
- Rolling pin (optional)
- Piping bag (or plastic bag)
Importance of Each Tool
- Baking sheet: Essential for evenly baking the cookies without sticking.
- Parchment paper: Prevents the cookies from sticking to the baking sheet and makes cleanup easier.
- Piping bag: Allows you to easily decorate the cookies with melted chocolate for spider legs and eyes.
Ingredients
For the Cookie Base
- 1 batch chocolate cookie dough (homemade or store-bought)
For the Spider Decorations
- 24 chocolate truffles or round chocolates (like Lindor or Ferrero Rocher)
- ½ cup chocolate chips, melted (for legs and eyes)
- 24 candy eyes or white chocolate chips
How to Make Spooky Spider Cookies
Step 1: Preheat the Oven
Preheat your oven to 350°F (175°C). Line a baking sheet with parchment paper to prepare for baking.
Step 2: Shape the Cookies
- Roll the cookie dough into small balls.
- Place them on the lined baking sheet, ensuring they are spaced apart.
Step 3: Bake the Cookies
Bake the cookies in the preheated oven for 8 to 10 minutes until the edges are set but the centers remain soft.
Step 4: Add Chocolate Truffles
Remove the cookies from the oven. Immediately press a chocolate truffle into the center of each warm cookie. Allow them to cool slightly.
Step 5: Decorate with Chocolate Legs and Eyes
Using melted chocolate:
1. Pipe spider legs around each truffle.
2. Attach candy eyes or white chocolate chips to each truffle using melted chocolate as glue.
Let everything set before serving your delicious Spooky Spider Cookies!
How to Serve Spooky Spider Cookies
Serving Spooky Spider Cookies can be as fun as making them! These festive treats are perfect for Halloween parties and gatherings. Here are some creative serving suggestions to impress your guests.
Creative Display Ideas
- Spider Web Platter: Arrange cookies on a black or orange platter and use melted white chocolate to create a spider web design.
- Themed Table Setting: Decorate your table with Halloween-themed items, such as mini pumpkins and spooky decorations, alongside your cookies.
Pair with Drinks
- Milk: A classic choice that complements the chocolate flavor perfectly.
- Hot Chocolate: For an extra treat, serve your cookies with a warm mug of hot chocolate topped with whipped cream.
Kid-Friendly Options
- Decorating Station: Set up a decorating station where kids can add their own candy eyes or extra chocolate legs to personalize their cookies.
- Halloween Treat Bags: Package cookies in fun Halloween-themed bags for guests to take home.
How to Perfect Spooky Spider Cookies
To make sure your Spooky Spider Cookies turn out perfectly every time, consider these useful tips.
- Choice of Chocolate: Use high-quality chocolate truffles for the best flavor and visual appeal.
- Cooling Time: Allow cookies to cool completely before decorating; this prevents the melted chocolate from running.
- Cookie Size: Roll dough into uniform balls for even baking; this ensures all cookies bake at the same rate.
- Melting Technique: Melt chocolate slowly over low heat to avoid burning; this keeps it smooth for piping.
Best Side Dishes for Spooky Spider Cookies
Adding side dishes can enhance the overall experience when serving Spooky Spider Cookies. Here are some delightful options.
- Pumpkin Soup: A warm, creamy soup that adds a seasonal touch to your Halloween spread.
- Apple Slices with Caramel Dip: Fresh apples served with sweet caramel make a great contrast to the rich cookies.
- Cheese Platter: Include a variety of cheeses and crackers for a savory balance against the sweetness of the cookies.
- Veggie Tray with Hummus: Fresh vegetables served with hummus provide a healthy option for guests.
- Mini Hot Dogs: These bite-sized treats are always a hit at parties and complement the fun theme.
- Popcorn Bar: Offer different flavors of popcorn (cheese, caramel, etc.) for guests to mix and match as they enjoy their cookies.
Common Mistakes to Avoid
Avoiding common mistakes is crucial in making delicious Spooky Spider Cookies. Here are some pitfalls to watch out for:
-
Insufficient Cooling Time: Not letting the cookies cool completely before decorating can cause the melted chocolate to run off. Allow them to cool fully on a wire rack.
-
Skipping Parchment Paper: Baking without parchment paper can lead to cookies sticking to the pan. Always line your baking sheet for easy removal and cleanup.
-
Overbaking Cookies: Baking too long results in dry cookies. Keep an eye on them; they should come out while still soft in the center.
-
Inconsistent Cookie Sizes: Rolling cookie dough into uneven sizes leads to inconsistent baking. Use a cookie scoop for uniform balls that bake evenly.
-
Neglecting Decorating Details: Forgetting to use enough melted chocolate for legs and eyes can make your spiders look less appealing. Don’t skimp on the details for that spooky effect!
Storage & Reheating Instructions
Refrigerator Storage
- Store Spooky Spider Cookies in an airtight container.
- They will last for up to 5 days in the refrigerator.
Freezing Spooky Spider Cookies
- Freeze cookies in a single layer on a baking sheet before transferring them to a freezer-safe container.
- They can be frozen for up to 3 months.
Reheating Spooky Spider Cookies
-
Oven: Preheat the oven to 350°F (175°C) and warm cookies for about 5 minutes.
-
Microwave: Heat individual cookies on medium power for about 10-15 seconds.
-
Stovetop: Place a cookie in a skillet over low heat, covering it with a lid for about 1-2 minutes until warmed through.
Frequently Asked Questions
Here are some frequently asked questions about Spooky Spider Cookies:
How do I make gluten-free Spooky Spider Cookies?
You can use gluten-free flour as a substitute in your chocolate cookie dough recipe while following the same instructions.
Can I make Spooky Spider Cookies ahead of time?
Yes! You can prepare the cookie dough and freeze it, then bake when you’re ready or bake them ahead and store as directed above.
What are some Halloween Spider Cookies decorating ideas?
Consider adding edible glitter or using orange and black sprinkles for extra flair alongside candy eyes.
Are these Spooky Spider Cookies kid-friendly?
Absolutely! Kids love decorating these spooky treats, making them perfect for Halloween parties or family gatherings.
Final Thoughts
Spooky Spider Cookies are not only fun and festive, but they also offer endless customization options. Whether you want more chocolate or different candies, you can easily adapt this recipe. Try making these delightful treats, and enjoy sharing them with family and friends!
Spooky Spider Cookies
Spooky Spider Cookies are the ultimate Halloween treat that combines playful decoration with delicious chocolate flavor. These delightful cookies feature a soft, rich chocolate base topped with chocolate truffles and spooky spider decorations, making them a perfect addition to any Halloween celebration. Easy to make and fun for all ages, these cookies are sure to impress at parties, school events, or cozy movie nights. With their creepy-crawly appearance and mouthwatering taste, Spooky Spider Cookies will quickly become a festive favorite among kids and adults alike!
- Prep Time: 15 minutes
- Cook Time: 10 minutes
- Total Time: 25 minutes
- Yield: Approximately 24 cookies 1x
- Category: Dessert
- Method: Baking
- Cuisine: American
Ingredients
- Chocolate cookie dough (homemade or store-bought)
- 24 chocolate truffles (e.g., Lindor or Ferrero Rocher)
- ½ cup melted chocolate chips
- 24 candy eyes or white chocolate chips
Instructions
- Preheat your oven to 350°F (175°C) and line a baking sheet with parchment paper.
- Roll the cookie dough into small balls and place them on the prepared baking sheet, spacing them apart.
- Bake for 8 to 10 minutes until edges are set but centers remain soft.
- Remove from the oven and immediately press a chocolate truffle into the center of each cookie.
- Once slightly cooled, use melted chocolate to pipe spider legs around each truffle and attach candy eyes.
Nutrition
- Serving Size: 1 cookie (40g)
- Calories: 180
- Sugar: 12g
- Sodium: 60mg
- Fat: 9g
- Saturated Fat: 5g
- Unsaturated Fat: 3g
- Trans Fat: 0g
- Carbohydrates: 25g
- Fiber: <1g
- Protein: 2g
- Cholesterol: 10mg


