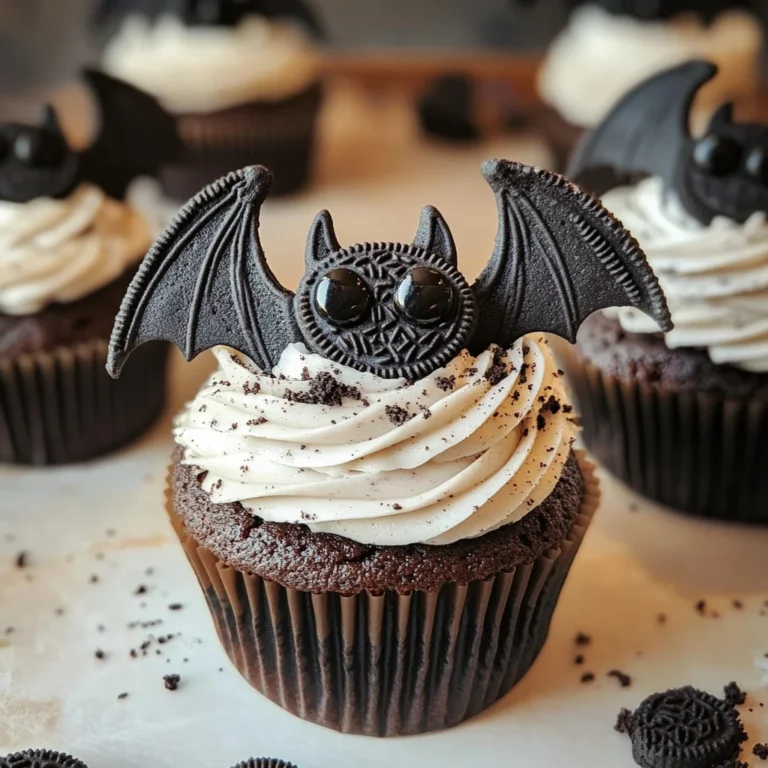
Bleeding Brain Cupcakes
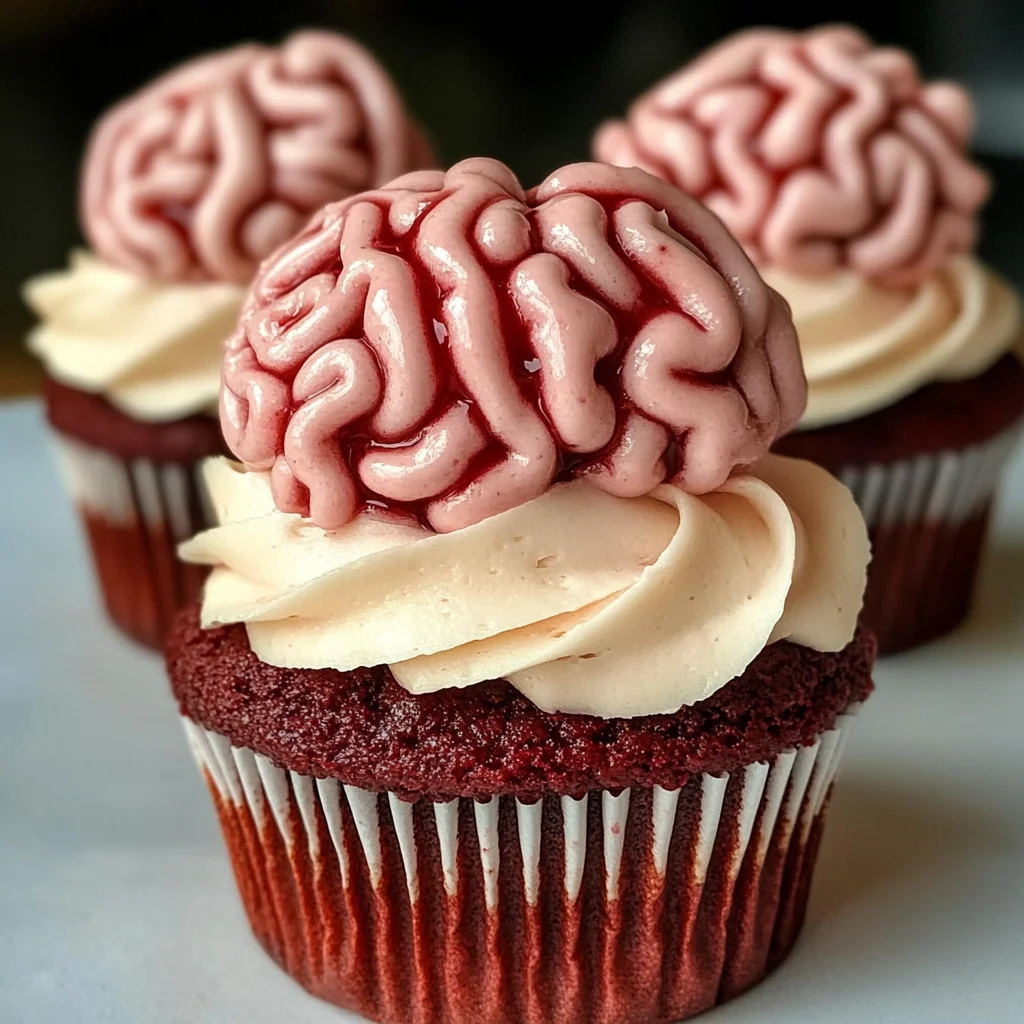
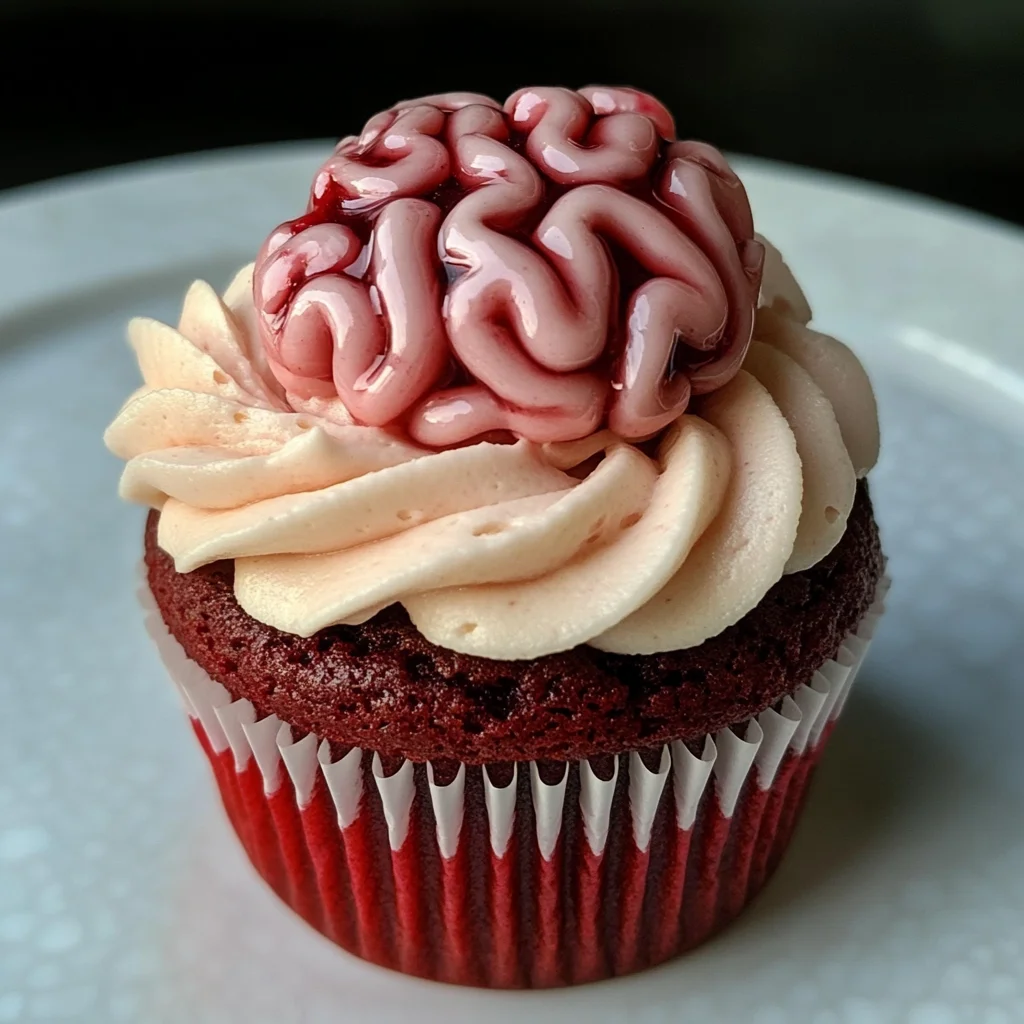
Bleeding Brain Cupcakes are the perfect spooky treat for Halloween or any fun celebration. These red velvet delights, filled with sweet jam and topped with a whimsical pink icing, are sure to impress your guests. Not only do they look fantastic, but they’re also easy to make, making them an excellent choice for bakers of all skill levels. Whether you’re hosting a Halloween party or just want to add some festive flair to your dessert table, these cupcakes will steal the show!
Why You’ll Love This Recipe
- Eye-Catching Presentation: The brain-themed icing makes these cupcakes a standout at any event.
- Delicious Flavor: The combination of red velvet and fruity jam creates a delightful taste sensation.
- Easy to Follow: With straightforward steps and common ingredients, anyone can whip these up!
- Versatile Treat: Perfect for Halloween, birthday parties, or as a fun surprise for loved ones.
- Customizable Options: Feel free to switch the jam flavors or adjust the food coloring for a unique twist.
Tools and Preparation
Before diving into this fun baking adventure, gather your tools. Having everything ready will make the process smooth and enjoyable.
Essential Tools and Equipment
- Cupcake tin
- Cupcake cases
- Mixing bowls
- Electric mixer (optional)
- Piping bag
- Circular/round nozzle
- Cooling rack
Importance of Each Tool
- Cupcake tin: Essential for shaping your cupcakes into perfect portions.
- Electric mixer: Saves time and effort when whisking ingredients to a fluffy consistency.
- Piping bag: Allows you to create beautiful designs on your cupcakes with ease.
Ingredients
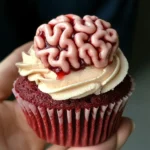
Red velvet cupcake, filled with jam, topped with brain themed pink icing – perfect for Halloween!
Ingredients:
– 150 g Butter or baking spread (softened, unsalted)
– 150 g Caster sugar
– 2 Eggs (large)
– 1 tsp Vanilla extract
– 85 ml Buttermilk
– 165 g Self raising flour
– 1 1/2 tbsp Cocoa powder
– 1/2 tsp Bicarbonate of soda
– 1 tsp Red food colouring (I use Pro Gel or Sugarflair)
– 200 g Strawberry or Raspberry Jam
– 200 g Butter (unsalted, softened)
– 400 g Icing sugar
– 1 tsp Vanilla extract
– 2 tbsp Milk
– Pink food colouring (I use Pro Gel or Sugarflair)
How to Make Bleeding Brain Cupcakes
Step 1: Preheat the Oven
Preheat your oven to 160C Fan/180C/350F/Gas Mark 4. Line a cupcake tin with black cupcake cases.
Step 2: Whisk Butter and Sugar
In a mixing bowl, whisk the butter and caster sugar together until fluffy. An electric mixer fitted with a paddle attachment works best.
Step 3: Add Eggs and Vanilla
Add the large eggs and vanilla extract into the bowl. Mix until well combined.
Step 4: Incorporate Buttermilk and Dry Ingredients
Add the buttermilk, cocoa powder, bicarbonate of soda, red food coloring, and self-raising flour. Mix until everything is combined well.
Step 5: Fill Cupcake Cases
Divide the mixture evenly between the lined cupcake cases.
Step 6: Bake the Cupcakes
Bake in the preheated oven for about 20-25 minutes. Check if they are done by inserting a skewer into the center; it should come out clean. Once baked, remove them from the oven and place them on a cooling rack to cool completely.
Step 7: Core the Cupcakes
Once fully cooled, use a cupcake corer or knife to create a hole in the center of each cupcake.
Step 8: Fill with Jam
Fill each hole with your choice of strawberry or raspberry jam using either a small spoon or piping bag.
Step 9: Make Buttercream Icing
To prepare the buttercream, mix softened unsalted butter in a bowl on its own for about two minutes. This step is best done using an electric mixer fitted with a paddle attachment.
Step 10: Combine Icing Ingredients
Gradually add icing sugar, milk, vanilla extract, and a small amount of pink food coloring into the mixing bowl. Mix until smooth. Adjust color if needed but remember to keep it pale pink!
Step 11: Pipe Icing onto Cupcakes
Place the buttercream into a piping bag fitted with a circular nozzle. Pipe one line down the center of each cupcake followed by squiggles on either side to create that brain effect.
Step 12: Store Your Treats
Keep your Bleeding Brain Cupcakes in an airtight container in a cool place. Enjoy leftovers within three days for optimal freshness!
How to Serve Bleeding Brain Cupcakes
Bleeding Brain Cupcakes are not only delicious but also a fun centerpiece for any Halloween gathering. Here are some creative serving suggestions to elevate your spooky dessert experience.
Creative Serving Suggestions
- On a Spooky Platter: Arrange the cupcakes on a black or eerie-themed platter to enhance their Halloween vibe.
- With Edible Decorations: Add gummy worms or candy eyeballs on top of the cupcakes for an extra frightful touch.
- Accompanied by Drinks: Serve with themed drinks like a fruity punch or non-alcoholic sparkling beverages to refresh your guests.
- In Individual Boxes: Package each cupcake in small, themed boxes for a take-home treat that guests will love.
- As Part of a Dessert Table: Include other Halloween-themed desserts like ghost-shaped cookies or pumpkin pie for variety.
How to Perfect Bleeding Brain Cupcakes
To ensure your Bleeding Brain Cupcakes turn out perfectly, keep these tips in mind as you bake and decorate.
- Use Room Temperature Ingredients: This helps create a smoother batter and ensures even mixing for fluffy cupcakes.
- Measure Accurately: Be precise with your ingredient measurements to achieve the best texture and flavor.
- Don’t Overmix the Batter: Mix just until combined to avoid dense cupcakes; overmixing can lead to tough results.
- Cool Completely Before Decorating: Allow cupcakes to cool fully before adding icing; this prevents melting and ensures clean decoration.
- Experiment with Colors: Feel free to adjust the food coloring based on your preference; just be cautious not to overdo it!
Best Side Dishes for Bleeding Brain Cupcakes
Pairing side dishes with your Bleeding Brain Cupcakes can create a festive dining experience. Here are some great options.
- Pumpkin Soup: A creamy pumpkin soup adds warmth and complements the sweetness of the cupcakes.
- Spooky Cheese Platter: Include various cheeses shaped like spiders or ghosts, paired with crackers for a savory contrast.
- Ghostly Fruit Salad: Use bananas, grapes, and berries arranged creatively to resemble friendly ghosts for a healthy option.
- Creepy Veggie Tray: Arrange veggies in the shape of a skull or monster, served with a dip that looks like witches’ brew.
- Themed Sandwiches: Cut sandwiches into spooky shapes using cookie cutters for an engaging finger food option.
- Chocolate Pudding Cups: Serve chocolate pudding in clear cups topped with crushed cookies for an easy and delightful dessert alternative.
Common Mistakes to Avoid
When making Bleeding Brain Cupcakes, it’s easy to make some common mistakes. Here are a few tips to help you achieve the best results.
- Boldly skip the cooling time: Not allowing your cupcakes to cool completely can result in a messy icing job. Always let them cool on a rack before decorating.
- Boldly overmixing the batter: Mixing too much can lead to dense cupcakes. Combine ingredients just until they are mixed for light and fluffy results.
- Boldly ignoring ingredient temperatures: Using cold eggs or butter can affect the texture. Make sure all ingredients are at room temperature for better mixing.
- Boldly using too much food coloring: Too much red food coloring can overpower the flavor and make the cupcakes taste artificial. Add it gradually until you reach your desired shade.
- Boldly forgetting to fill properly: Not filling the cupcake centers with enough jam will lessen the bleeding effect. Use a piping bag for precise filling.
Storage & Reheating Instructions
Refrigerator Storage
- Store in an airtight container for up to 3 days.
- Keep in a cool place away from direct sunlight.
Freezing Bleeding Brain Cupcakes
- Place in an airtight container or freezer bag for up to 2 months.
- Layer parchment paper between cupcakes if stacking to prevent sticking.
Reheating Bleeding Brain Cupcakes
- Bold Oven: Preheat to 150°C (300°F) and warm for about 10 minutes.
- Bold Microwave: Heat individual cupcakes on medium power for 10-15 seconds.
- Bold Stovetop: Use a covered pan on low heat for about 5 minutes, checking frequently.
Frequently Asked Questions
Here are some common questions related to Bleeding Brain Cupcakes that might help you during preparation.
Can I use other flavors for jam?
Absolutely! You can substitute with any fruit jam you like, such as blueberry or cherry, depending on your preference.
How do I achieve a brain-like icing?
To create a brain effect, pipe a line down the center and add squiggles on either side. Practice makes perfect!
Are Bleeding Brain Cupcakes suitable for kids?
Yes! These festive cupcakes are fun and appealing to kids, making them perfect for Halloween parties or themed events.
How can I customize my Bleeding Brain Cupcakes?
Feel free to experiment with different food colorings or even add sprinkles on top after icing for added texture and fun!
Can I make these cupcakes gluten-free?
You can substitute self-raising flour with gluten-free flour blends available in stores—just ensure it has a rising agent included.
Final Thoughts
Bleeding Brain Cupcakes are not only visually stunning but also deliciously indulgent. These red velvet treats are perfect for Halloween celebrations or any event where you want to impress guests. Customize them with different jams or icings for your unique twist!
Bleeding Brain Cupcakes
Bleeding Brain Cupcakes are the ultimate spooky treat to elevate your Halloween celebrations or any festive gathering. These visually striking red velvet cupcakes are filled with luscious fruit jam and topped with whimsical pink icing, making them not only a feast for the eyes but also a delight for the taste buds. With their moist texture and deliciously sweet flavor, these cupcakes are sure to impress guests of all ages. The best part? They’re simple to make, ensuring that bakers of all skill levels can whip up this fun dessert without any stress. Get ready to add some eerie excitement to your dessert table!
- Prep Time: 20 minutes
- Cook Time: 25 minutes
- Total Time: 45 minutes
- Yield: Approximately 12 cupcakes 1x
- Category: Dessert
- Method: Baking
- Cuisine: American
Ingredients
- 150 g unsalted butter or baking spread (softened)
- 150 g caster sugar
- 2 large eggs
- 1 tsp vanilla extract
- 85 ml buttermilk
- 165 g self-raising flour
- 1.5 tbsp cocoa powder
- 0.5 tsp bicarbonate of soda
- 1 tsp red food coloring
- 200 g strawberry or raspberry jam
- 200 g unsalted butter (for icing)
- 400 g icing sugar
- 1 tsp vanilla extract (for icing)
- 2 tbsp milk
- Pink food coloring
Instructions
- Preheat the oven to 160C Fan/180C/350F/Gas Mark 4 and line a cupcake tin with black cases.
- In a mixing bowl, whisk softened butter and sugar until fluffy.
- Beat in eggs and vanilla extract until well combined.
- Add buttermilk, cocoa powder, bicarbonate of soda, red food coloring, and self-raising flour; mix until just combined.
- Divide the batter evenly among the cupcake cases and bake for 20–25 minutes or until a skewer comes out clean.
- Once cooled, core each cupcake and fill with jam.
- To make the icing, beat softened butter until creamy, then gradually add icing sugar, milk, vanilla extract, and pink food coloring; mix until smooth.
- Pipe the icing onto cupcakes in a brain-like design.
Nutrition
- Serving Size: 1 serving
- Calories: 320
- Sugar: 38g
- Sodium: 120mg
- Fat: 12g
- Saturated Fat: 7g
- Unsaturated Fat: 4g
- Trans Fat: 0g
- Carbohydrates: 51g
- Fiber: 0g
- Protein: 3g
- Cholesterol: 60mg